
| The purpose of this document is to give a comprehensive explanation
of how to build and use a ram, as well as how to best plan the logistics
of moving them into battle.
The information presented here was compiled with painstaking effort by the author, and should not be re-posted in whole or in part elsewhere without the author's permission. DAoC Battering Rams |
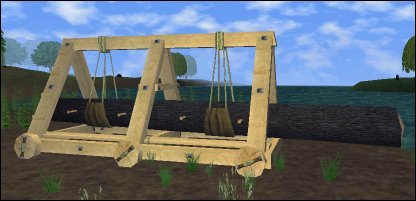
Siege Ram in Resting Position |
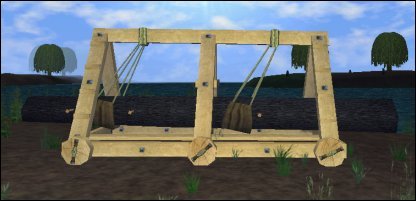
Siege Ram Armed for Firing (note the position of the swings) |
Component Formulas
|
|
Component |
|
|
|
|
|
Ferrite Ram Beak |
|
|
|
|
|
Ferrite Ram Cladding |
|
|
|
|
|
Tanned Swing Harness |
|
|
|
Production Costs
| Class I: Small Ram | ||
|
|
|
|
| 300 Elm Wooden Boards (Vendor) |
|
|
| 1 Ferrite Ram Beak |
|
|
| 1 Ferrite Ram Cladding |
|
|
| 2 Tanned Swing Harnesses |
|
|
|
Total Cost:
|
|
|
| Class II: Battering Ram (Ram) | ||
|
|
|
|
| 300 Oaken Wooden Boards (Vendor) |
|
|
| 1 Ferrite Ram Beak |
|
|
| 1 Ferrite Ram Cladding |
|
|
| 2 Tanned Swing Harnesses |
|
|
|
Total Cost:
|
|
|
| Class III: Siege Ram | ||
|
|
|
|
| 300 Ironwood Wooden Boards (Vendor) |
|
|
| 1 Ferrite Ram Beak |
|
|
| 1 Ferrite Ram Cladding |
|
|
| 2 Tanned Swing Harnesses |
|
|
|
Total Cost:
|
|
|
Crafted costs are determined using materials bought in stacks of 20.
All costs rounded off to the nearest sp.
Note that each formula uses the same crafted parts, they only vary in the
wood used.
| The difference in rams is quite pronounced:
Class I does approximately 300 dmg. Class II does approximately 450 dmg. Class III does approximately 750 dmg. Note: These are their approximate damages against a Level 1 door. Higher
level doors reduce the maximum damage the ram delivers.
Component Procurement Albion - Caer Benowyc, in Hadrian's Wall Hibernia - Dun Cruachon, in Emain Macha Midgard - Bledmeer Faste, in Odin's Gate -Wood can be purchased in Tir Na Nog, Innis Carthaig, and at any Merchant
Keep.
Note: Many merchants sell siege components that are not usable in any
siege weapon. For example, in a frontier merchant keep you may find a "Ram
Beak" for sale on one vendor. This item is not usable in a ram. You must
use a "Ferrite Ram Beak". Be particularly cautious of this disparity when
purchasing Ferrite Ram Beaks and Cladding, since these must
be made of ferrite, and "Ram Beak" and "Ram Cladding", while useless, are
sold by NPC merchants.
Weight Considerations |
Ram Component Weights
|
|
|
|
| Tanned Swing Harness (2) |
|
|
| Ferrite Ram Beak |
|
|
| Ferrite Ram Cladding |
|
|
| Wooden Boards (300) |
|
|
|
Total Weight:
|
|
| Based on these figures, 1 ram weighs 239 lbs, regardless of the wood
used. Here are some guidelines to use so that your ram arrives at the keep
with all of its components.
1) Use as few a number of people as possible to transport components. 2) When allocating weight among individuals, never give them more weight they they can carry, unencumbered, while self-buffed. Example: Garek is a L50 warden with 160 strength. Self-buffed (w/ L50 strength buff, +50 strength) his strength is 211. Check your encumberance, self-buffed, to know how much you can carry. Keep in mind your armor and weapons count against your encumberance too, so be sure to look at your encumberance and not only your strength. With 211 str the max encumberance is 210, and Garek carries approximately 50 pounds of equipment (tools, weapons, armor, etc.) so he can carry 160 lbs of equipment. Although Garek's strength is much higher with a druid's strength/constitution buff, he does not carry more than 160 lbs of siege equipment. The reason for this is, if someone is strength buffed and their buffer disconnects, they will be overloaded, and likely unable to move. If you come into contact with the enemy while moving to your objective, and the strength buffer is killed, overloaded party members will become rooted by their encumberance, and easy pray to enemy troops. Wardens, Bards, and Druids are ideal choices for carrying siege equipment for their self-buffed capacity, with Heroes, Blademasters, and Champions being a close second for their raw strength. Many members of these classes are also often Firbolgs, which gives them an even greater weight capacity. |
|
Distributing Ram Components Allocating parts for one ram across two carriers should look something
like:
|
|
Building a Ram Make sure you have a sewing kit, smithing hammer, and planing tool on you when attempting to build any siege weapon! To physically emplace a ram, stand before the door you wish to breach of the enemy keep. You must be careful to stand close enough to the door that it will be in range for the completed ram to hit it, if you stand too far away, the ram will be out of range and therefore useless, since rams are all stationary and cannot be moved. The contact point of a ram is not the tip of the beak; the actual contact point is the middle of the chasis of the ram. For that reason you need the center of the chasis very close to the door. This center point is built directly where the engineer is standing, so simply running into the door before placing the ram will always be close enough. The equipment carriers pass the engineer the full list of components once the engineer is standing in the spot the weapon needs to be built. The weight of all the components may overload the engineer to the point that he will be unable to move at all. Be mindful of this if the engineer is killed before construction is complete! If the engineer needs ressurecting before he has built the weapon, the resser needs to stand exactly where the engineer died, so that the engineer will be in the correct spot for construction. If you ressurect the engineer 50 feet away from where he died, he will not be able to walk to the correct spot, and all the equipment on him will need to be offloaded so he can move, creating a waste of critical time. |
|
Readying the Ram |
|
|
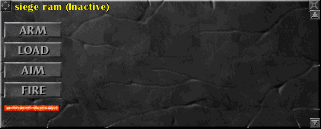 |
| To use the ram against the door, the next thing you need to do, now that you have your pop-up menu available and are in control of the ram, is click on the door you are trying to breach. This will have a name like "Albion Gate". With the gate targeted, hit the "Aim" button on the pop-up window. You will receive a dialog message confirming you have now aimed the ram. |
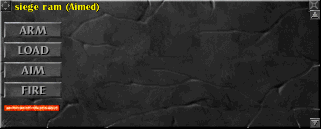 |
| Now, hit the button marked "Arm" on the control window. The timer bar will begin to fill. It takes 5 seconds to arm a ram. Note that the timer bar takes much longer than 5 seconds to fill, so do not rely on the bar to gauge when the ram is ready. |
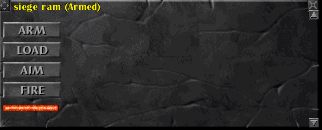 |
| After 5 seconds has elapsed, press "Fire" button in the window, and
the ram will visually swing back and forward one time. You will also receive
a melee damage report of the ram's damage.
|
|
Macro 1 - Siegecraft menu Siege Ram icon
Now for the construction:
And if the ram requires repairs,
(Hotkey Method contributed by Nittany, <Dark Octopus> Guild, on Hibernia, Gawaine) |
|
It is essential that you watch the ram's health bar to avoid having
it decay before you are done. Rams decay two different ways:
Presently siege weapon repairs only check the repairer's Woodworking skill using a pass/ fail skill check. If successful, you will repair the ram's hit points to full. These repairs cost no resources, and do not require any wood or other material to attempt. If you fail your repair attempt, simply try again. |
|
|
|
|
|
|